
Claude Code has six permission modes: default (labelled Manual), acceptEdits, plan, auto, dontAsk and bypassPermissions. They decide which actions run without asking you. From v2.1.283, interactive terminal and VS Code sessions start in auto mode. Switch modes with Shift+Tab, start in one with --permission-mode, or set permissions.defaultMode and allow, ask and deny rules in settings.json.
The six Claude Code permission modes compared
In config files, hooks and SDKs, Manual mode is called default. The CLI also accepts manual as an alias.
| Mode | Label and status bar | What runs without asking | Best for |
|---|---|---|---|
default | Manual, ⏸ manual mode on | Reads only | Reviewing every action, sensitive work |
acceptEdits | Edit automatically, ⏵⏵ accept edits on | Reads, file edits and common filesystem commands | Iterating on code you're reviewing |
plan | Plan, ⏸ plan mode on | Reads, plus classifier-approved commands when auto mode is available | Exploring before changing anything |
auto | Auto, ⏵⏵ auto mode on | Everything, with background safety checks | Long tasks, less prompt fatigue |
dontAsk | ⏵⏵ don't ask on | File reads and pre-approved tools. Anything that would prompt is denied | Locked-down CI and scripts |
bypassPermissions | Bypass permissions, ⏵⏵ bypass permissions on | Everything, except the actions no mode approves | Isolated containers and VMs only |
Manual mode and acceptEdits
In Manual mode, Claude Code stops and asks before most actions that edit files, run shell commands or reach the network. File reads and Grep inside your working directory and additional directories run without asking. A built-in set of read-only Bash commands also runs without a prompt. It includes ls, cat, echo, pwd, head, tail, grep, find, wc, which, diff, stat, du, cd and read-only forms of git.
For fewer prompts without a classifier, start in Manual mode, run /sandbox and choose auto-allow. The built-in Bash sandbox works on macOS, Linux and WSL2.
In acceptEdits, Claude Code edits files in your working directory or additionalDirectories without asking:
- It also approves
mkdir,touch,rm,rmdir,mv,cpandsed. - Except for
touch, these also pass with safe prefixes such asLANG=Cor wrappers such astimeout,niceandnohup. - With the PowerShell tool on,
Set-Content,Add-Content,Clear-ContentandRemove-Itemon in-scope paths are covered too.
Plan mode and auto mode
Plan mode tells Claude to research and propose changes without making them. Edits stay blocked until you approve the plan, except in interactive terminal sessions with bypass permissions available. Shell commands depend on the session:
- If auto mode is available and
useAutoModeDuringPlanis on, which is the default, the classifier reviews commands other than critical-path removals. - Otherwise, commands outside the built-in read-only set prompt for approval.
When the plan is ready, choose Yes, and use auto mode, Yes, manually approve edits or No, keep planning. Ctrl+G opens the plan in your text editor. See Claude Code Plan Mode: how to use it and approve plans.
In auto mode, a separate classifier model reviews actions before they run. It blocks anything that escalates beyond your request, targets unrecognised infrastructure or appears driven by hostile content Claude read. Auto mode needs a supported model:
- On the Anthropic API and Claude Platform on AWS: Opus 4.6 or later, Sonnet 4.6 or later, Haiku 5.5 or a Fable model.
- On Amazon Bedrock, Google Cloud's Agent Platform, Microsoft Foundry and the signed-in Claude apps gateway: Sonnet 5 or later, Opus 4.7 or later, Haiku 5.5 or a Fable model.
The classifier uses Sonnet 5 by default. From v2.1.302, CLAUDE_CODE_AUTO_MODE_MODEL sets a full model ID for the classifier. After 3 blocks in a row or 20 in total, auto mode pauses and prompts resume.
dontAsk, bypassPermissions and what no mode approves
dontAsk runs file reads in your working directories and tools pre-approved through /permissions or permissions.allow. It auto-denies every other call that would prompt, though a mod you installed can still approve some of them.
bypassPermissions skips permission prompts, including writes to protected paths such as .git and .claude. Use it only in isolated containers or VMs. To block auto or bypassPermissions, set permissions.disableAutoMode or permissions.disableBypassPermissionsMode to "disable". These keys are most useful in managed settings, where users can't override them.
No mode auto-approves the following, not even bypassPermissions:
- Tools matched by an explicit
askrule. - Connector tools your organisation set to
ask. AskUserQuestionand MCP tools markedrequiresUserInteraction.- Critical-path
rmandrmdirremovals, and commands flaggedDangerous rm operation not ruled out. - Cross-session messaging safeguards.
- Reads outside working directories while
permissions.blockReadsOutsideWorkingDirectoriesis on, from v2.1.257. - Writes outside working directories while
permissions.blockWritesOutsideWorkingDirectoriesis on, from v2.1.314.
In bypassPermissions, you can turn off the prompt for dangerous rm commands.
How to start in or switch permission modes
Terminal sessions take their starting mode from the first of these that applies: the --permission-mode flag or --dangerously-skip-permissions, then permissions.defaultMode in a settings file, then the built-in default.
claude --permission-mode default
claude --permission-mode plan
To start your sessions in Manual mode, set permissions.defaultMode in ~/.claude/settings.json:
{
  "permissions": { "defaultMode": "default" }
}
Scope and fallback rules:
- A project's
.claude/settings.jsonor.claude/settings.local.jsonignores"auto", and the session uses the built-in default. - Those project files ignore
"bypassPermissions"too, and the session starts in Manual mode. - The built-in
autodefault needs v2.1.228 or later on macOS, Linux and WSL, and v2.1.233 or later on native Windows. - From v2.1.302,
claude -pand Agent SDK runs with no mode set start in Manual.
Switching modes in the CLI, VS Code, desktop app, web and mobile
- CLI:
Shift+Tabcycles modes. Fromauto, the first press goes todefault, thenacceptEditsandplan. - Optional modes: enabled optional modes such as
bypassPermissionsjoin the cycle afterplan.dontAsknever appears. - Bypass without starting in it:
--allow-dangerously-skip-permissionsaddsbypassPermissionsto the cycle without activating it. - Switch to auto from a prompt: from v2.1.247, Bash permission prompts can offer Yes, and switch to auto mode.
- VS Code extension: click the mode indicator. The labels are Manual, Edit automatically, Plan, Auto and Bypass permissions.
- VS Code starting mode: set
claudeCode.initialPermissionModein your user settings todefault,manual,acceptEdits,planorbypassPermissions. - VS Code limits: the setting rejects
auto, and the extension never reads a project's.claude/settings for the starting mode. - Claude desktop app: use the mode selector under the prompt box. A local pick is remembered per folder and outranks the project's
defaultMode. - Desktop bypass: it needs the Allow bypass permissions mode toggle on Pro, Max and Ultra. Organisation policy controls it on Team and Enterprise.
- Web and mobile: cloud sessions offer Accept edits, Plan and Auto, and Bypass permissions is not available.
- Remote Control: sessions offer Manual, Accept edits, Plan and Auto. Start one in a mode with
claude remote-control --permission-mode acceptEdits.
Configure allow, ask and deny rules in settings.json
Permission rules sit on top of the active mode. Use /permissions to edit them mid-session. A change applies from Claude's next tool call in the same turn. You can also set permissions.allow, permissions.ask and permissions.deny in user, project, local or managed settings:
{
  "permissions": {
    "allow": ["Bash(npm run *)", "Bash(git commit *)"],
    "deny": ["Bash(git push *)"]
  }
}
Choosing "Yes, and don't ask again" for a Bash command or a WebFetch domain keeps the approval permanently for that repository. Approvals for file edits last until the session ends.
How rules are evaluated:
- Claude Code checks
deny, thenask, thenallow, and the first match decides. - Rule specificity doesn't change the order, so an allow rule can't carve an exception out of a deny rule.
- A user-level deny blocks a project-level allow, and a project-level deny blocks a user-level allow.
- A bare tool name in
deny, such asBash, removes the tool from Claude's context. - A scoped rule such as
Bash(rm *)keeps the tool and blocks only matching calls.
Wildcards, paths, domains and parameters
Rules use the form Tool or Tool(specifier):
- Bash wildcards:
*stands for any text.Bash(ls *)matcheslsandls -labut notlsof. - Trailing
:*:Bash(ls:*)matches the same commands asBash(ls *). - Compound commands: Claude Code splits commands on
&&,||,;,|,|&,&and newlines. Every subcommand must be allowed. - Wrappers: before matching, Claude Code strips
timeout,time,nice,nohup,stdbuf,command,builtinand zsh'snoglob. - PowerShell: rules are case-insensitive, and a rule for
Get-ChildItemalso matches the aliasesgci,lsanddir. - File paths:
ReadandEditrules use gitignore pattern syntax.//pathstarts at the filesystem root, and~/pathstarts at your home folder. - Read deny: a
Readdeny rule also blocksEditandWriteon the same path. TheWritecheck needs v2.1.228 or later. - WebFetch:
WebFetch(domain:example.com)also adds the domain to the sandbox's domain list. A bareWebFetchrule does not. - Parameters: rules can match a parameter of a built-in tool, such as
Agent(model:opus)orBash(run_in_background:true).
Enforce or automate permissions with PreToolUse and PermissionRequest hooks
Hooks receive JSON on stdin with session_id, cwd, hook_event_name and permission_mode. The mode labelled Manual arrives as "default", never as "manual". See Claude Code hooks: events, matchers, settings and handlers and Claude Code and Codex hooks: payload reference.
PreToolUse hooks fire before any permission-mode check, in every mode, including dontAsk:
- Exit code
2blocks the call, and your hook'sstderrbecomes the reason. - Exit code
0with no output makes no decision, so the normal permission flow continues. permissionDecision: "deny"blocks the tool even inbypassPermissionsmode."allow"skips the prompt, but deny rules from settings still apply.- In plan mode, an
"allow"for a file edit gets the same result the edit would get with no hook.
{
  "hookSpecificOutput": {
    "hookEventName": "PreToolUse",
    "permissionDecision": "deny",
    "permissionDecisionReason": "Destructive command blocked by hook"
  }
}
PermissionRequest hooks run when Claude Code is about to ask you for permission. A Notification hook with the permission_prompt matcher fires only after the prompt has waited about six seconds. A PermissionRequest hook answers with hookSpecificOutput.decision.behavior set to "allow" or "deny". To change the mode as well, add an updatedPermissions entry of type setMode. This example approves ExitPlanMode and switches the session to acceptEdits:
{
  "hooks": {
    "PermissionRequest": [{
      "matcher": "ExitPlanMode",
      "hooks": [{
        "type": "command",
        "command": "jq -c '{hookSpecificOutput: {hookEventName: \"PermissionRequest\", decision: {behavior: \"allow\", updatedInput: .tool_input, updatedPermissions: [{type: \"setMode\", mode: \"acceptEdits\", destination: \"session\"}]}}}'"
      }]
    }]
  }
}
Keep the matcher narrow. An empty matcher or .* would approve every permission prompt, including file writes and shell commands.
When auto mode denies a call, PermissionDenied fires. Its hook can return hookSpecificOutput.retry: true to tell the model it may retry. Claude Code ignores this when the classifier gave no verdict.
Build allow, ask and deny rules with the free Claude Code permissions builder, then copy the settings.json permissions block.
Watch Claude Code sessions and answer prompts on a keypad or phone with Orbtile
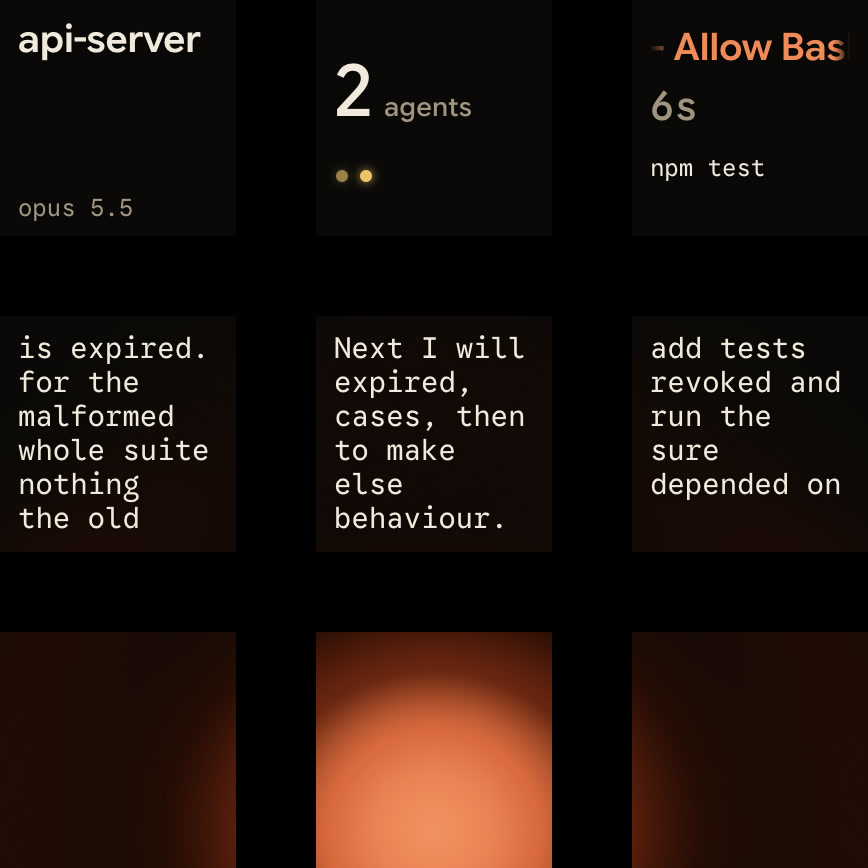
Orbtile shows each Claude Code session on a key of the Logitech MX Creative Keypad, or on a phone with Orbtile Mobile. It runs on an Apple silicon Mac with macOS 14 or later, or a Windows 11 PC (x64). Orbtile Mobile needs iOS 17 or later, or Android 8.0 or later. Logi Options+ is not required.
- Install the plugin in Settings > Agents > Claude Code on a Mac, or with its Install button on Windows.
- Restart Claude Code sessions that were already running once, so they load the plugin.
- Each session key shows the session's name, its state and its latest words over an animated Frosted orb.
- States include Thinking, Tool, Streaming, Permission, Question, Done and Error.
- Waiting sessions move to the front and glow in Claude Code's terracotta waiting colour.
- Tap key 9 to focus the first waiting session.
- Auto mode approves low-risk actions without asking, so the keypad sees only the requests Claude Code still asks about.
- To answer every request on the keypad, switch to Manual mode with
Shift+Tabor start withclaude --permission-mode manual. - For a permission request, hold the session key for 0.6 seconds to open Focus mode.
- Press Deny on key 7, or hold Allow on key 9 for 0.6 seconds.
- The keypad can answer for about 25 seconds. The prompt on screen still works, and whichever answers first wins.
- For a multiple-choice question, keys 1, 2, 3 and 7 show the options, and you hold Send on key 9.
- Typed answers stay on your computer.
- Remote sessions over SSH are display-only.
Orbtile also shows Codex, ZCode, Antigravity and Kimi Code sessions. See Approve agent tool calls without switching windows and Know when Claude Code asks you a question or wants a plan approved.
FAQ
What are the permission modes in Claude Code?
Claude Code has six permission modes: default, which is labelled Manual, acceptEdits, plan, auto, dontAsk and bypassPermissions. From Claude Code v2.1.283, interactive terminal and VS Code sessions start in auto mode, where a separate classifier model reviews actions before they run.
What is the difference between dontAsk and bypassPermissions?
dontAsk runs only file reads and tools you pre-approved, and denies anything that would otherwise prompt, which suits locked-down CI. bypassPermissions skips permission prompts, except for the actions no mode approves, and is meant only for isolated containers or VMs.
Why does setting defaultMode to auto or bypassPermissions in project settings not work?
Terminal sessions ignore auto and bypassPermissions when they are set in a project's .claude/settings.json or .claude/settings.local.json file. With auto there, Claude Code uses the built-in default instead. With bypassPermissions there, the session starts in Manual mode. Set the mode in your user ~/.claude/settings.json file or pass the permission-mode flag at launch.
Why do Deny and Allow not appear on my keypad in Orbtile for every Claude Code action?
Recent Claude Code versions start in auto mode, which approves low-risk actions without asking. Orbtile only sees the requests Claude Code still asks about. To answer every request from the Logitech MX Creative Keypad or Orbtile Mobile, switch the session to Manual mode with Shift+Tab, or start it with the permission-mode flag set to manual.